Hi there. LifeChurch.tv is a solid Cisco shop – routing, switching, firewalls, and even voice. We have 14 locations in 5 states and over the last year we've been on a quest to remove Single Points of Failure from our network. I've written about this a bunch of times, and this post links back to the highlights.
For many years now we've used the Cisco CallManager (voice) and Unity (voicemail / unified messaging) products at all our campuses – currently running CUCM 7.1(3) and Unity 7.0(2) today. For a time we even integrated Tandberg HD endpoints at our locations but ran into bandwidth issues (no QoS ability in consumer-grade broadband) and have scrapped that project.
For the last few weeks, we've been building our Exchange 2010 environment. We had to put this project on hold because (whine whine) Cisco Unity is not yet compatible with Exchange 2010. In the meantime, I've been reading a lot about Exchange 2010 Unified Messaging, which led to a small pilot of direct SIP trunking of Cisco CUCM to Exchange 2010. So far, so good. I really like it. I'm not ready to completely jump ship from Unity to Exchange UM but I'm always up for learning about possible better solutions for our environment. Let's walk a little through the project, eh?
Welcome to the LC.tv IT Skunk Works Project #1 🙂
Cisco CUCM Configuration
To start, we need to create a SIP Trunk on the Cisco CUCM side pointing at our Exchange 2010 UM environment. I couldn't find anything specific to Exchange 2010 & CUCM 7, but I did find this handy document which details how to do this with CUCM 5.1 and Exchange 2007.
Fire up your CUCM Administration portal…
Let's start by creating a new SIP Trunk which will connect CUCM with Exchange 2010. Open Device -> Trunk -> Add
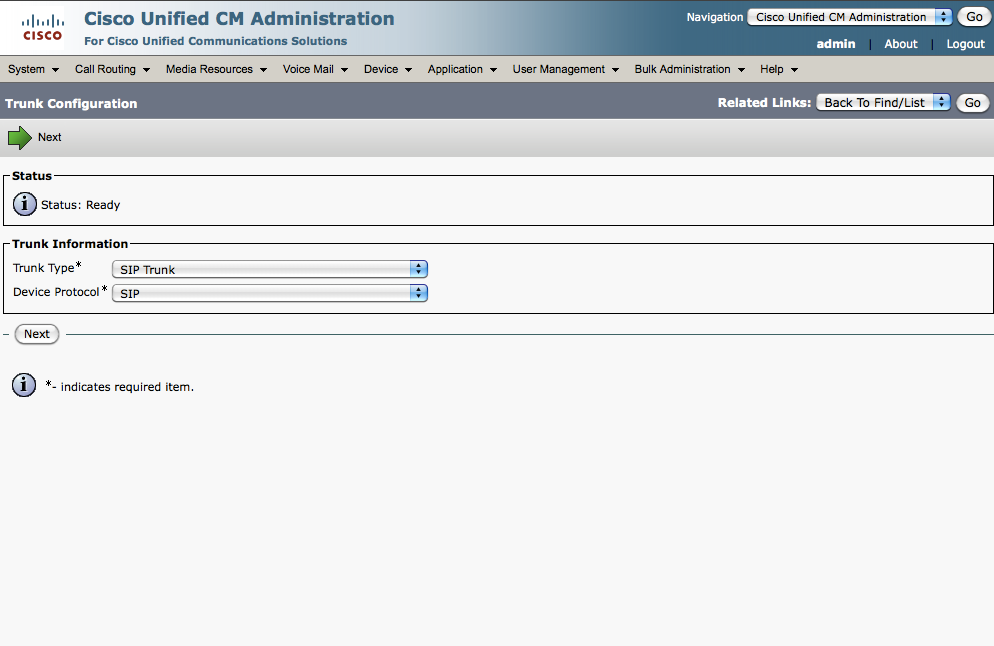
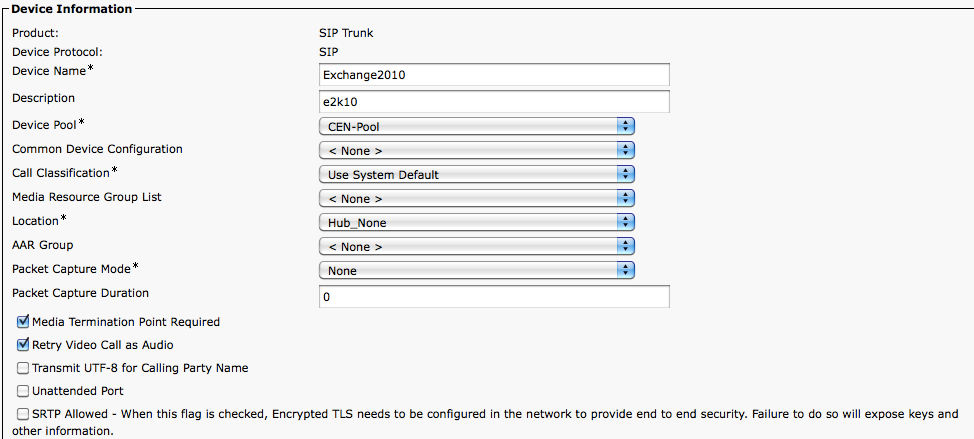
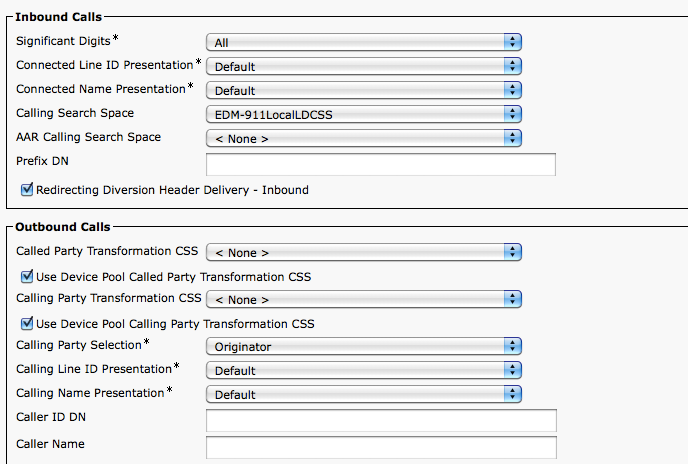
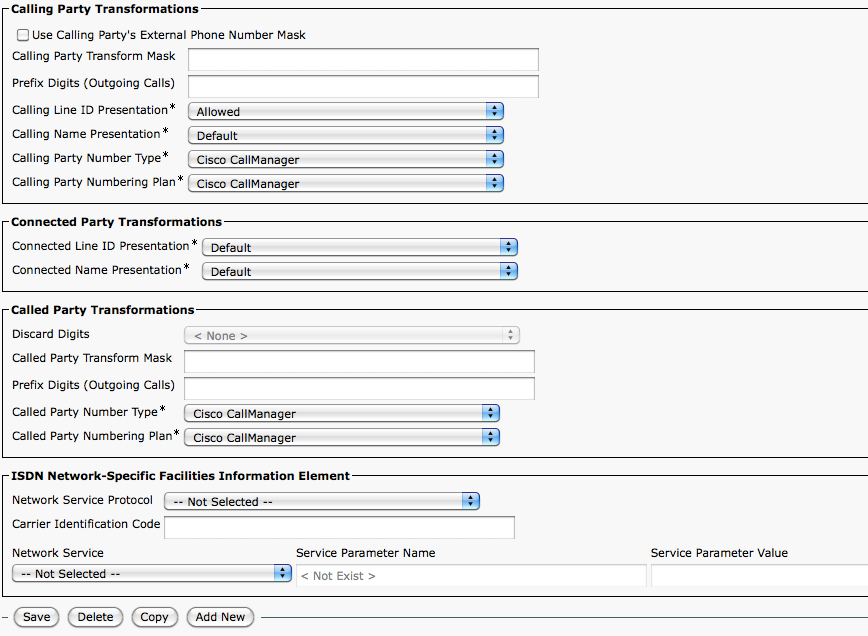
Choose SIP Trunk. Click Next. Our Trunk Config is here. You can read the linked setup document for more specifics of why I chose what I did.
and
and
and
Two things to note here:
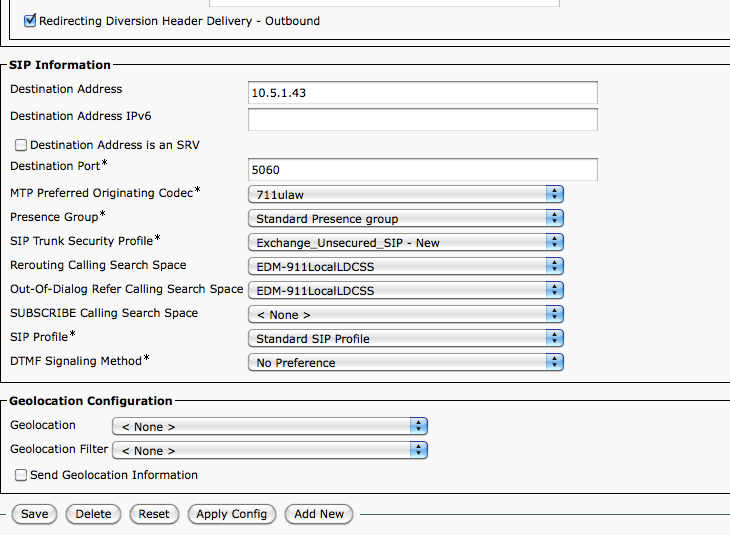
- 10.5.1.43 is the IP of my Exchange 2010 UM Box
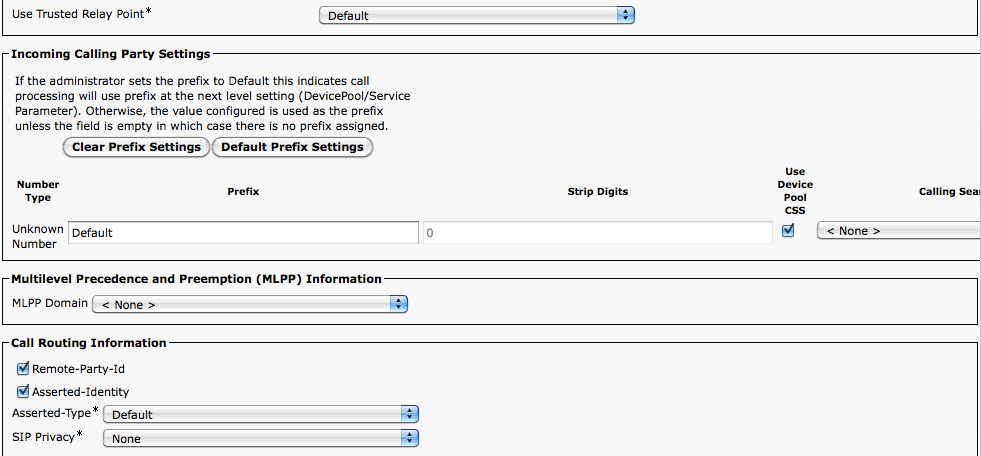
- I created a separate "unsecured" SIP Trunk Security Profile which was necessary because of the Message Waiting Indicator (MWI) stuff… That profile looks like this…
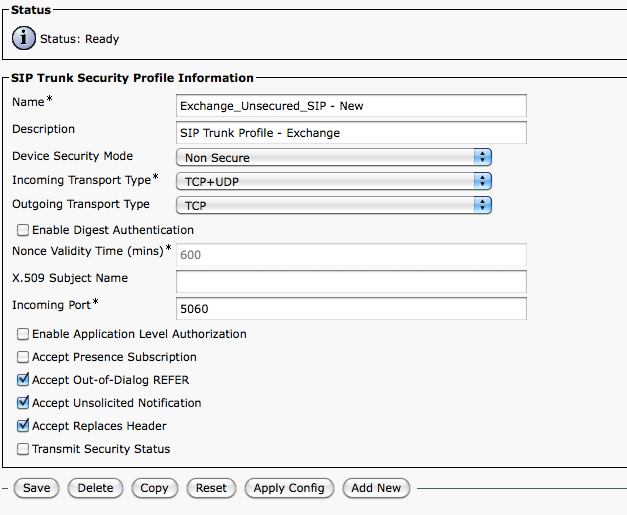
Those 3 checkboxes above were necessary to make the MWI work properly.
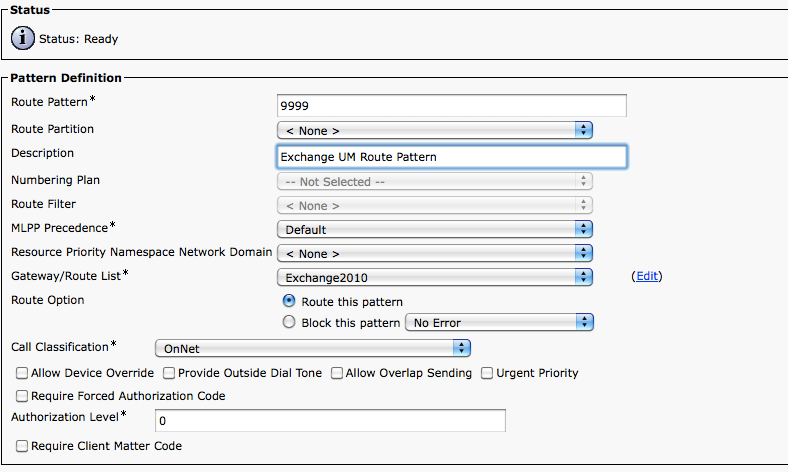
Great, now, let's create a new Route Pattern. Head over to Call Routing -> Route/Hunt -> Route Pattern. This is the number we'll "dial" to access the Exchange 2010 UM Featuresets. Ours looks like this:
and
Notice that we're using "9999" and forwarding anything there out the SIP Trunk (Exchange2010) from earlier in this setup.
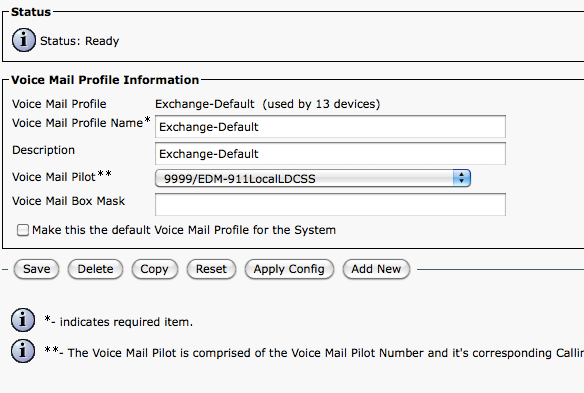
Now, let's setup the new voicemail profile pointing to Exchange 2010 UM. Navigate over to Voicemail -> Voicemail pilot and create a new one. Ours looks like this:

Complicated, huh? Now, let's assign that pilot to a profile. Navigate to Voicemail -> Voicemail Profile and create the profile for Exchange 2010 UM. Ours looks like this:
There ya go. Now it's time to actually make one of our phones USE this Profile and send voicemail calls to Exchange 2010 UM instead of Cisco Unity. Navigate over to Device -> Phone and select the right phone/line for this profile. I'll show you this on one of my extensions:
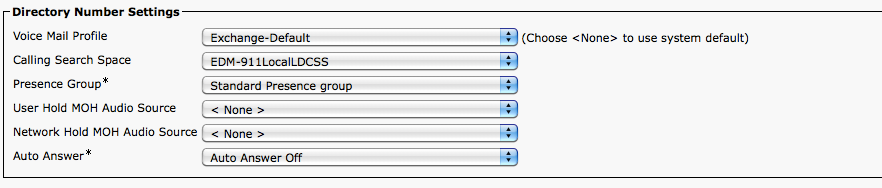
Notice that I chose the "Exchange-Default" Voicemail Profile… and…
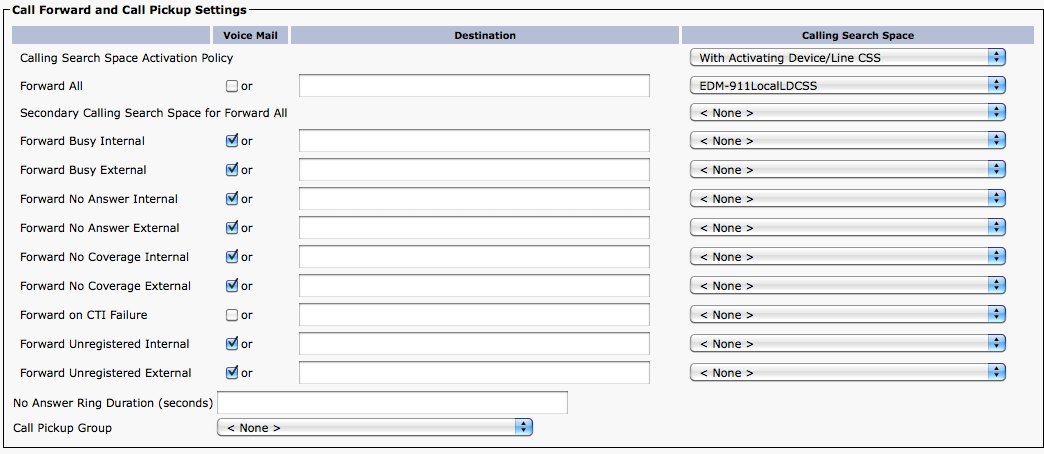
Of course I need to make sure I have all the voicemail settings set correctly also… these didn't change from my existing Cisco Unity configuration.
That's that. Cisco Callmanager configuration done.
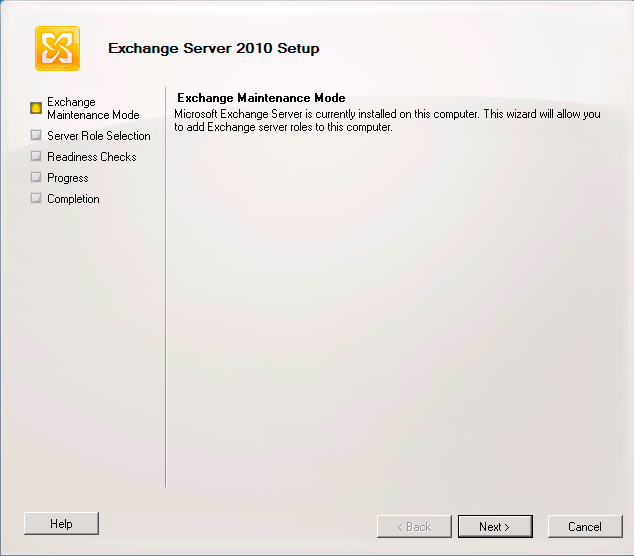
Install Exchange 2010 UM
We'll start off by installing the Exchange 2010 Unified Messaging (UM) Role on an Exchange 2010 box. Launch the Exchange setup process.
Yup, we're adding another role. Click Next.
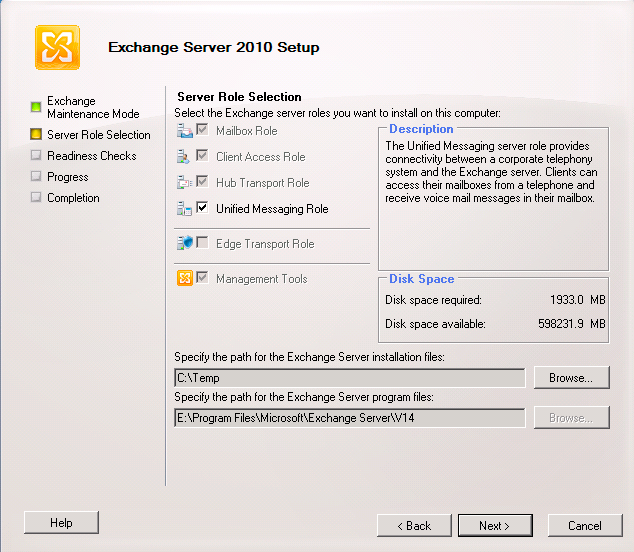
Yes, add the Unified Messaging Role. Click Next.
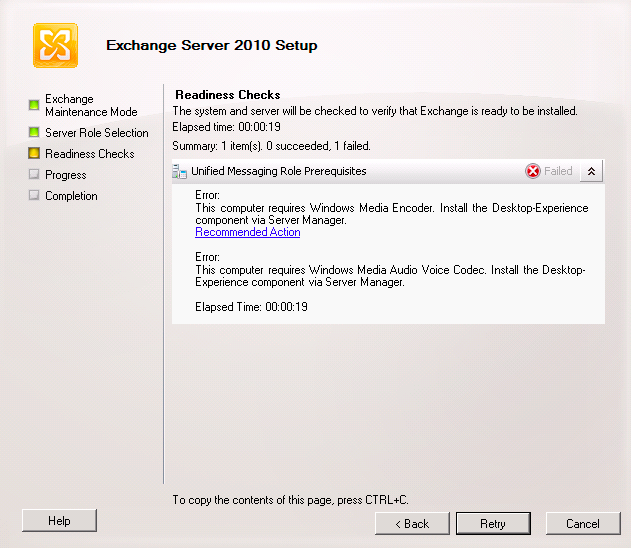
Oh, lookie there. UM requires the Windows Media Encoder / Desktop-Experience Feature. Close this and launch the Server Manager. We need to add a feature.
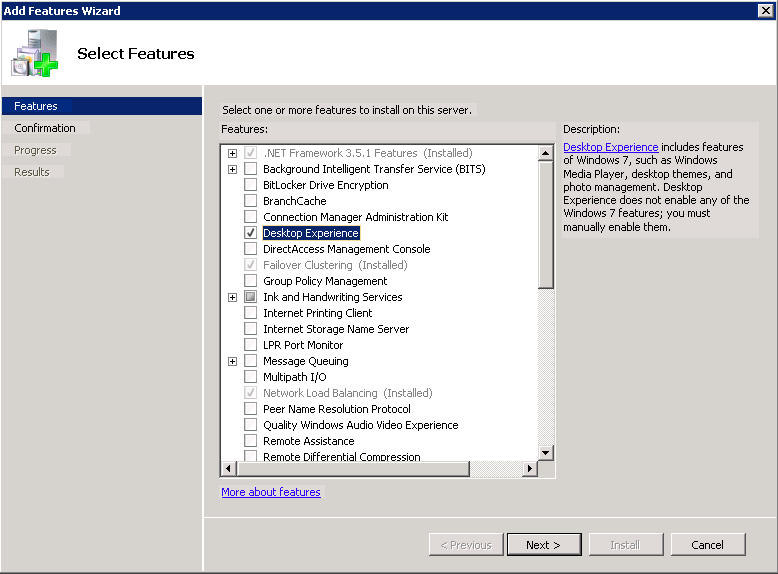
That's the one. Desktop Experience. Click Next.
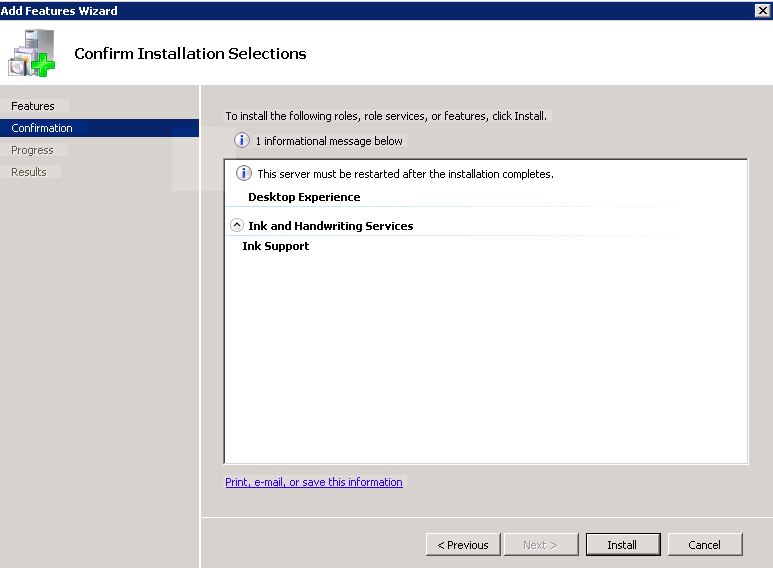
Okay. Click Install.
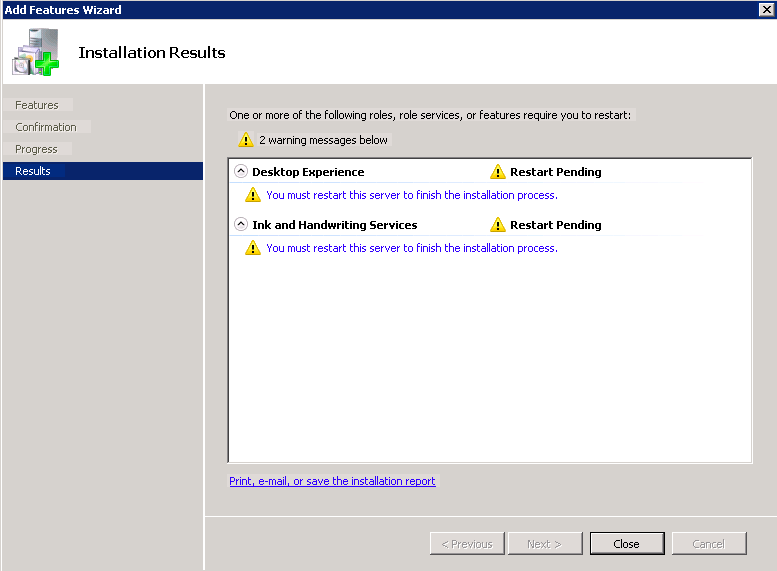
Great. It's ready to restart. Click Close and restart your Exchange box.

After a reboot and configuration, the Desktop Experience feature finishes. Click Close and head back to Exchange setup and add the UM Role.
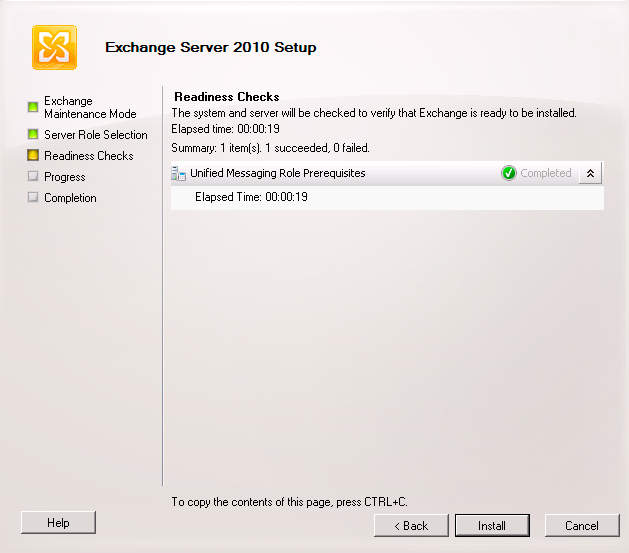
Great! We passed the pre-req this time. Click Install.

Hooray! Now, click Finish and in our case, we did this on our 2nd Exchange 2010 box also.
Let's make sure it worked… launch Exchange Management Shell and we're gonna run a shell cmdlet to verify the role installed correctly:
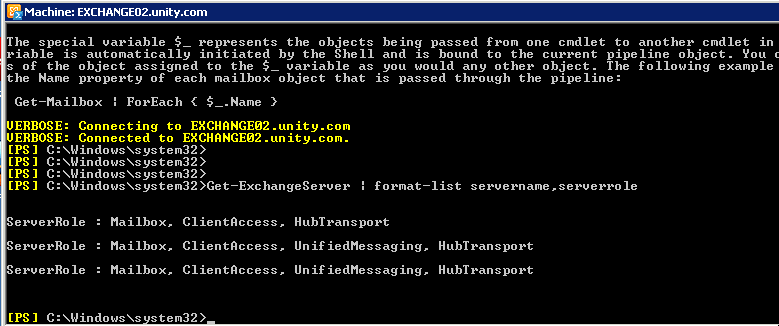
Hooray! Looks good. Installation Complete.
Be sure to come back next time. In Part 2 we'll dive into configuration and actually make this work for a test user – probably me.
Howdy Daryl! Great post. We are setting this up with CallManager 6.1. Quick question. The Caller-ID is presenting our 4 digit extension plus the IP of the callmanager:
A call was received with the following parameters:
Calling Party: “sip:2421@10.115.30.16”,
Called Party: “sip:8100@10.102.20.99”,
Diversion Information: “”Alex Rodriguez” ;reason=deflection;privacy=off;screen=yes “,
Referred-By Header: “”,
Call ID “ec0e9500-e321d27b-1d6a5-101e730a@10.115.30.16”.
How were you able to pass just the extension without the IP? Thank you.
ARod–
I didn’t. What you see there is part of the SIP INVITE / “ladder setup” process.
You kinda want that info – so both sides know where the “source” traffic is so it’s properly routed between gateways.
What’s not working?
–DW