For the last few months at LifeChurch.tv, we've been working hard getting our Nexenta SAN up and running. Nexenta is the "software" that runs on our Pogolinux.com "Z400 hardware." The goal is to replicate our Apple XSAN + EMC SAN data from our Central Datacenter to our OKC Datacenter.
I first described the project last year. Just a couple months ago, I blogged about our network changes that are facilitating all this data transfer.
The unthinkable happened in April. We dropped our SAN. Yes, you read that right. We were moving our Disaster Recovery rack from Central to OKC, and the liftgate malfunctioned, and everything smashed to the ground. It hit one of our techs, Warren, on the way down and broke his femur in 6 places. YOWZAA!!!!
Since April, we've been working with Nexenta and Pogolinux.com to identify any bad hardware (we found 24 bad drives) and firmware (there was an LSI controller firmware adjustment needed) and software (a few random little "gotchas" in Nexenta v1 were resolved in v2 – and the COMSTAR plugin for iSCSI v1.1 is UBER-AWESOME!)
Fast forward – we're in the middle of drive replacment – and our hardware is now "100% stable" – so, we reinstalled the Nexenta software yesterday (July 14). Today (July 15) I started getting volumes back the way we want them. I thought I'd share some of the management interfaces.
What's the NMV?
Nexenta has a Web GUI – the Network Management View / NMV – and that's where I spent a lot of my time.
From the NMV, you can look at some rich status on the storage, network, CPU and RAM statistics. You can adjust all sorts of settings. You can manage your storage volumes and then share them out via iSCSI, NFS, CIFS, WebDAV, etc. There are a good group of Analytics you can chart as well.
What's the NMC?
Nexenta also has a very powerful CLI – the Nexenta Management Console / NMC – and many of the advanced features are better run from the NMC. Hitting "tab" twice brings up all the NMC commands:
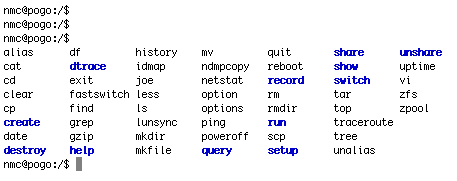
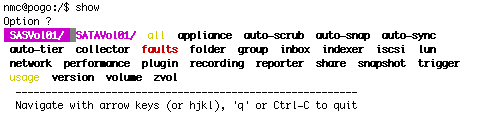
The "show" and "setup" commands are where I mostly live. Each NMC command can be run using the full context "show plugin comstar" or you can type in "show", hit enter, and then be given a context-aware menu to continue on your command choices.
NMV vs. NMC
The differences between the NMV and NMC remind me quite a bit of Exchange 2007. Inside Exchange 2007, you can manage things from the Console in a graphical manner. Or, just as easily, you can manage things in the shell using Powershell. Both are valid. Similarly, Nexenta can be managed from the NMV or NMC. Both are valid – although I've been told the more advanced featuresets are in the NMC.
So, Do Something Already
Let's end this post by building a volume. Our Nexenta hardware is actually a group of 5 chassis each with 24 drives (120 drives total). We have 96 SATA drives and 24 SAS drives. Let's build a volume, called SATAVol01, and place all the SATA drives in it. As an aside, 24 of our SATA drives are bad – they are being replaced – so you will only see me managing 70 drives total (2x SATA for OS, 70x SATA for storage).
Start with "setup volume" in the NMC
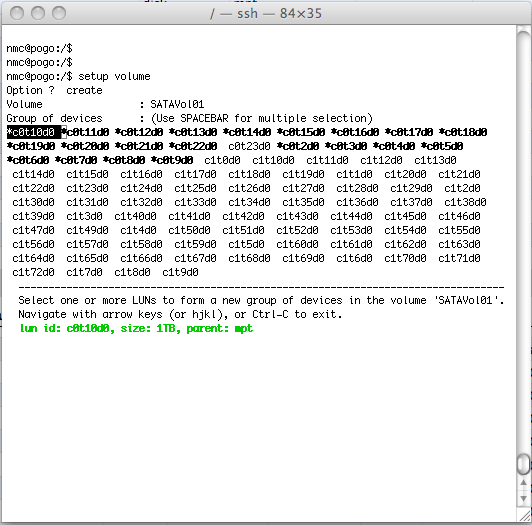
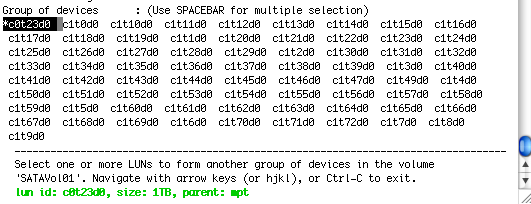
You'll see I've highlighted 21 disks – in my first chassis, I have 2x SATA drives for OS and 22x SATA drives for striping. One of those will be a spare. So, I just chose the first 21 drives and will use the "last" drive as the spare. You'll notice the drives are known by their SCSI IDs (c0t23d0). Nexenta includes a tool to map the SCSI IDs to the appropriate chassis and drive position – "setup lun slotmap" – we've already done this.
Anyway, I've highlighted 21 disks – and hit enter.
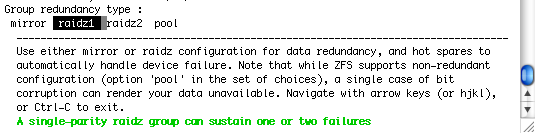
What type of data strip? How about raidz1. That's the ZFS equivalent to RAID5. Hit Enter.

Yes Please
Let's select the "last" drive of chassis 1 – this will be our spare. Hit enter.
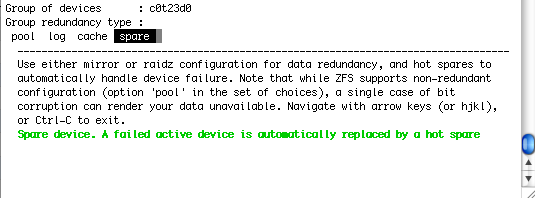
Yes, spare. Hit enter.
No thanks. We're done for now.

Yes please. Now, let's see what that looks like in the NMV (GUI)
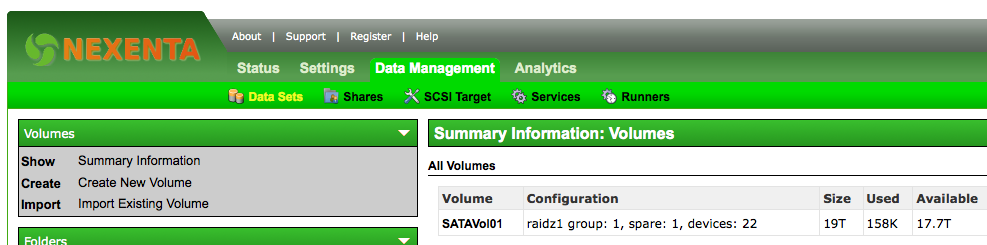
Okay, you'll see the volume is a raidz1, 1 spare, and has 22 devices (21 in the stripe).
But, we have 70 drives. Let's grow the volume. "setup volume SATAVol01 grow"
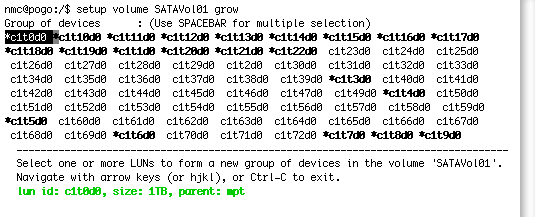
Okay, let's choose the next 23 drives (24 in a chassis, 1 for spare – remember) – Hit enter.
Yup, raidz1 again. Want to match. Hit enter.
Yes please
Just that one. Hit enter.
Right, spare. Hit enter.
No thanks. Hit enter.
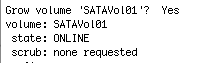
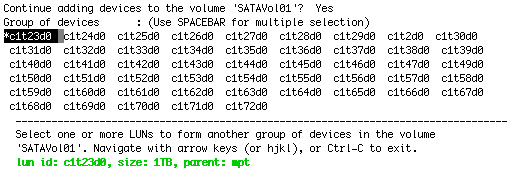
Yes, please grow. It does, and gives you some info. Let's look at the info in NMV

Looks good. Now, continue and add the next 24 drives.
What does the NMC say about the SATAVol01 now?
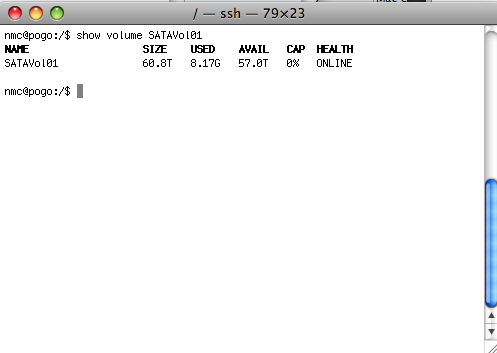
And the NMV?

Great. Good work. You now have a volume with three stripes and then aggregated among the different chassis. What are we gonna DO with that storage? Sounds like a topic for another post or two. Stay tuned! // Update – Part 2 talks about thin provisioning and MacOS!
Interesting that you are using 21 drives in a single zvol. I was under the impression that fewer disks = better performance and stability. Also impacts the time it takes to replace a failed drive?
From the ZFS best practices guide specific to RAIDZ:
The recommended number of disks per group is between 3 and 9. If you have more disks, use multiple groups.
Is there a reason you are using 21 disks in a group? Or did I miss something in your configuration?
Hey Ty, you’ve got a great question. This is a couple years ago, and this particular situation was unique – needed a CRAP TON of storage just for replication. It was not primary storage. Normally, I would not do RAIDZ1 and normally I would not put that many drives ina single ZVOL. What I didn’t post here was that this was rebuilt, with different hardware, and different RAIDZ2 config (using 12 disks – still too many probably but met my storage requirements)
When I deal with “normal storage” – I keep a RAID5 between 5-9 disks as the sweet spot for balance between read/write performance.