Last night I successfully upgraded the LifeChurch.tv ESX cluster from v3.5 Update 1 (Build 82663) to v3.5 Update 3 (Build 123630) and it went great. So well in fact that I hope I didn't miss anything important 🙂
At least the version numbers show it was successful 🙂
Before:

After:

I upgraded to Update 1 about 6 months ago using the ESX VMWare Update Manager Client Plugin. It was easy and simple and worked perfectly. The Update Manager allows you to update the ESX hosts themselves, or actually individual guest VMs. Read that again. You can update your Windows Guest VMs using this tool – no WSUS, no SMS, no System Center… straight from the tool. Neat, huh?
Well, I had planned to use the Update Manager a few months ago to upgrade to "Update 2" but that didn't happen. Update 2 had some really bad problems which caused many people to not be able to boot their VMs. You can read this thread which really articulated the problem, and resolution, very well. I chose to just sit tight and wait.
When I went to upgrade to "Update 3" I realized that I couldn't get Update Manager to work. I don't know why. It was no longer pulling down updates, and I don't really know how that product works. I fiddled with it for several days before realizing you can simply download a tarball of all the updates. Yup, that's right, you can logon to vmware.com, and download the large .zip containing all of the updates in Update 3. Cool.
Here's what I did, and how it worked. Your mileage may vary.
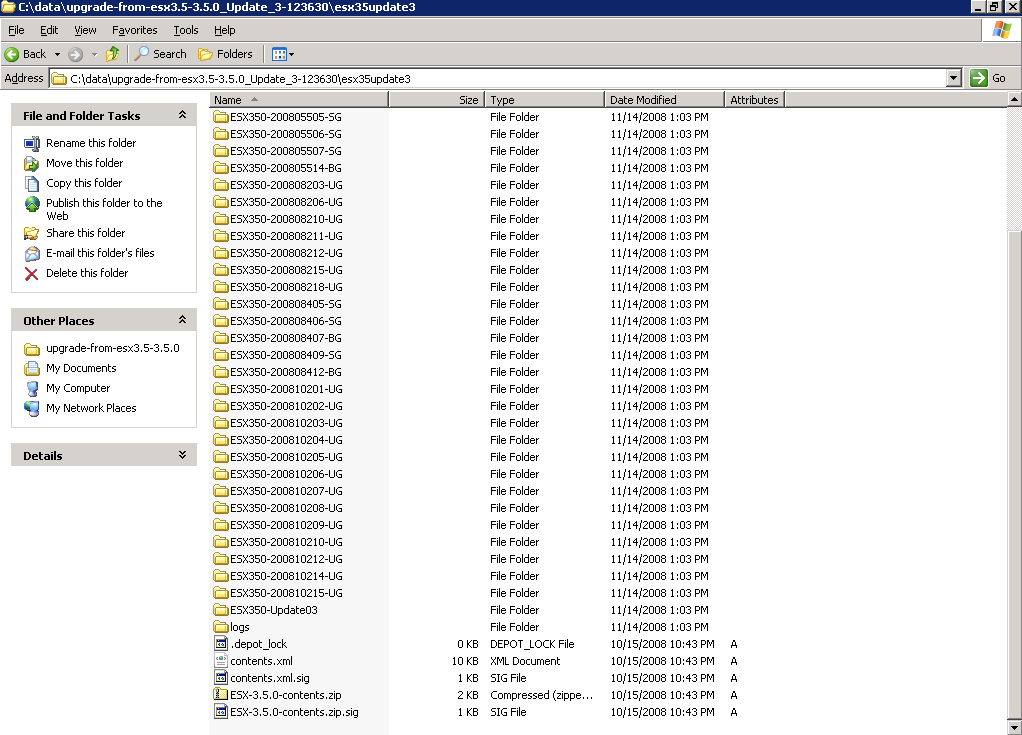
First of all, I downloaded the .zip file.. it was approximately 425megs and named upgrade-from-esx3.5-3.5.0_Update_3-123630.zip. I then extracted that to a folder called "esx35update3" and you can see all of the subfolders and packages created below:
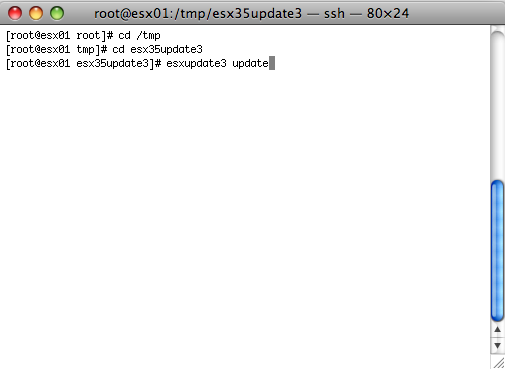
Secondly, I downloaded an sftp client. I chose to used Filezilla and copied the entire esx35update3 folder structure to /tmp/ on the esx host cleverly named "esx01" I chose to do this as root, so if you don't have root/ssh enabled (it's disabled by default), you can learn how to do so here.
Next, I put the esx01 host into "Maintenance Mode" by right-clicking on it and choosing Maintenance Mode. This evacuated all the VMs to other ESX hosts using VMotion. Vmotion is the greatest tool ever. It allows you to migrated running VMs between hosts WITH ZERO DOWNTIME. Yes. ZERO.
Anyway, once esx01 was in maintenance mode, and the esx35update3 package was uploaded to /tmp, I SSHed into the server. After changing directories to /tmp/esx35update3, all I had to do was run the update tool. This is done by using the "esxupdate update" command inside the /tmp/esx35update3 directory and you can see it below
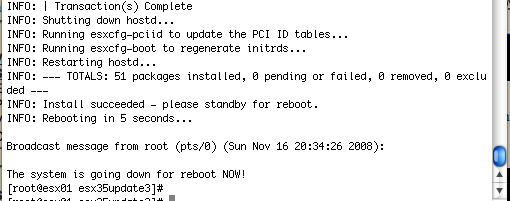
Now, sit back, relax, and watch the magic happen. In about 20 minutes, my host was updated and automatically rebooted… it installed 51 updates for me..
Now, lather, rinse, and repeat the same on all of your ESX hosts… for me that's esx02 and esx03
Happy Virtualizing